

How to Make a Word Document Look Professional in 8 Steps
Wondering how to make a word document look professional? Knowing how to format a document in Microsoft Word is an essential skill if you want to create a polished, well-designed business report, academic paper, blog article, or any other type of document. No matter how good your writing is, a poorly presented document will always make a bad impression on the reader.
Our latest post will teach you eight essential steps for making any document look professional. And at the end, we’ll also offer you an opportunity to build your formatting skills even further.
Why Is Formatting Important?
You never get a second chance to make a good first impression! A poorly formatted document can have a very negative impact on how your message is received. If a person is turned off by the look of a document, they may not take it seriously, even if the content itself is high quality. They may even dismiss it altogether.
In contrast, a well-formatted document shows professionalism. It shows your audience – whether that’s a client, employer, customer, or teacher – that you respect them, and have taken care to prepare a document that is high quality in every regard. Success doesn’t just lie in the quality of your writing; the visual presentation is also vital. A well-formatted document has the power to convey your insights with efficiency, educate with clarity, and persuade with conviction.
8 Essential Steps for Formatting a Word Document
Microsoft Word has all the tools you need to make whatever kind of document you want. It isn’t hard to create something professional, though there are so many functions that it can be hard to know where to get started. We will guide you through the process by showing you eight steps for making all your documents flawless:
- Pick the right font
- Use standard page size and margins
- Organize content for readability
- Add section breaks
- Set up headers, footers, and page numbering
- Make sure line and paragraph formatting is consistent
- Take advantage of styles for consistency
- Keep it simple
1. Pick the Right Font
The first thing you need to do is choose the right font for your document. Before we explore the dos and don’ts, it’s important to note the distinction between serif and non-serif fonts:
- A serif font has a small stroke at the end of each longer stroke of individual letters (e.g. Times New Roman). This is a tradition that dates back to ancient Roman times when letters were painted onto rock before they were carved. The stone carvers followed the stroke left by the paintbrush, and that is what created the serif. It is believed that serif fonts are easier to read on documents that will be printed, so they are the best choice for books, newspapers, magazines, etc.
- Non-serif, or sans-serif fonts (e.g. Arial), began to appear at the beginning of the 19th century. They were traditionally used for clarity when the writing was to be printed either very large or very small. Later, they became popular for documents that were to be presented on-screen. The simple letterforms of most non-serif fonts make the text easily readable in a digital format.
Whether you choose a serif or a non-serif font, make sure it matches the purpose of the document. Different fonts convey different tones and levels of formality. For example, a font like Curlz would be inappropriate for a serious business document.
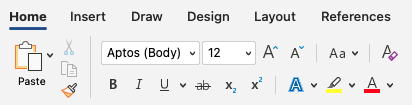
When it comes to size, a 12-point font is normally preferred for readability on a document that conforms to standard formatting for line spacing, margins, and page size. If there is a lot of dense information, it is occasionally acceptable to go down to a 10-point font, but no lower than that.
There is rarely a need to make any adjustments to color. Not only can colored fonts make printing more expensive, they can make the document harder to read. If you want to show emphasis, it is best to use bold or italics.
Whichever font style and size you use, implement it consistently throughout the document.
You can access the font menu from the ‘Home’ tab in Microsoft Word:
2. Use Standard Page Size and Margins
Most documents should be formatted to print on A4 (or US letter size) paper (8½” x 11″). This size is readily available in most printers and considered quite standard. It is the default setting for Microsoft Word documents.
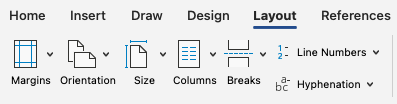
Most style manuals and guides call for a 1″ margin on all sides of the page. This allows for written notes if necessary (select ‘Normal’ under the margins tab). If the document is going to be bound, you may want to customize the settings and increase the side margin.
Both page size and margin settings can be found under the ‘Layout’ tab:
3. Organize Content for Readability
Most people don’t like looking at a document that is just a wall of pure text. It’s best to add structure to your document, and organize it in a way that makes it easier to read. Headings, subheadings, bullet points, numbered lists, etc. can all help with readability.
Organizing your content has many benefits:
- Draw the eye and make the document much easier to read
- Improve search engine optimization for online documents
- Increase accessibility for e-readers
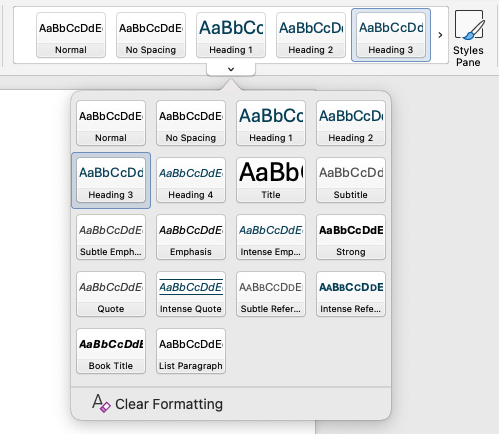
These options can all be found under the ‘Home’ tab. Headings and subheadings can be selected from the ‘Styles’ subsection. Typically, you should use Heading 1 for the main headings, Heading 2 for subheadings, Heading 3 for sub-subheadings, and so on:
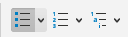
Bullet points and numbered lists are found in the ‘paragraph’ subsection. Try to use the same bullet or numbering style throughout your document:
4. Add Section Breaks
Section breaks allow you to break larger documents into smaller sections. You can then apply different formatting to each section. For example, you might want to change the orientation of one section to landscape to accommodate a wider image or table.
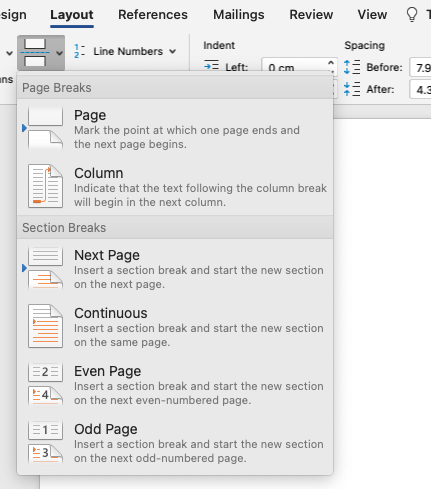
There are various types of section breaks:
- Next Page: Start the next section on the following page.
- Continuous: Start the next section on the current page.
- Even Page: Start the next section on the next even-numbered page.
- Odd Page: Start the next section on the next odd-numbered page.
Access to all these different section breaks is found by clicking on ‘Breaks’ under the ‘Layout’ tab:
Once you have the proper breaks added, you can apply separate formatting to each section. Remember not to overdo it, though! Too many changes in format could become confusing for the reader.
5. Set Up Headers, Footers, and Page Numbering
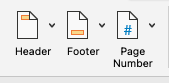
This is quite a simple step, but will make your document look very professional. If no section breaks have been used, the headers, footers, and page numbers will be continuous throughout the whole document. If breaks have been used, you can customize these for each section.
The settings for these are all found under the ‘Insert’ tab:
6. Make Sure Line and Paragraph Formatting Is Consistent
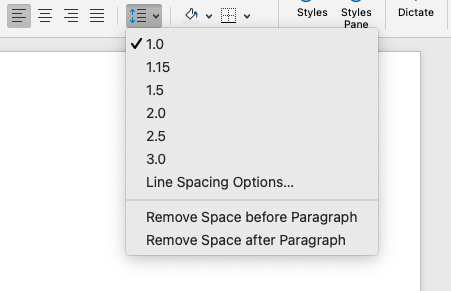
Line spacing refers to the amount of space in between your lines of text.
Paragraph spacing will change the space that is under or above each paragraph.
These can both be adjusted to make the document look clean, organized, and easy to read.
It’s wise to align paragraphs to the left. Some people may be tempted to use justified alignment, but that is more suitable for novels and textbooks than professional documents. Justifying text can result in gaps and typographic rivers. Using left alignment will ensure your letter spacing is consistent along with your lines and paragraphs.
You can adjust alignment, and line and paragraph spacing, from the ‘Home’ tab:
Remember to indent the first lines of your paragraphs unless they come directly after a section heading. The indent size should be about the same size as your font size.
7. Take Advantage of Styles for Consistency
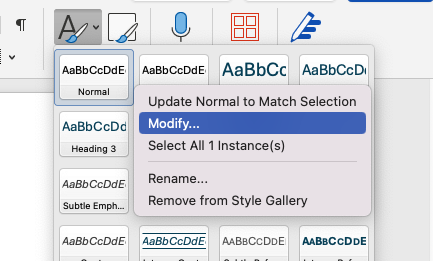
Using Words’ built-in styles feature can simplify the formatting process and make it easy to produce professional-looking documents every time. Instead of formatting each section, paragraph, heading, etc. directly, styles can apply your formatting choices consistently throughout the entirety of your document.
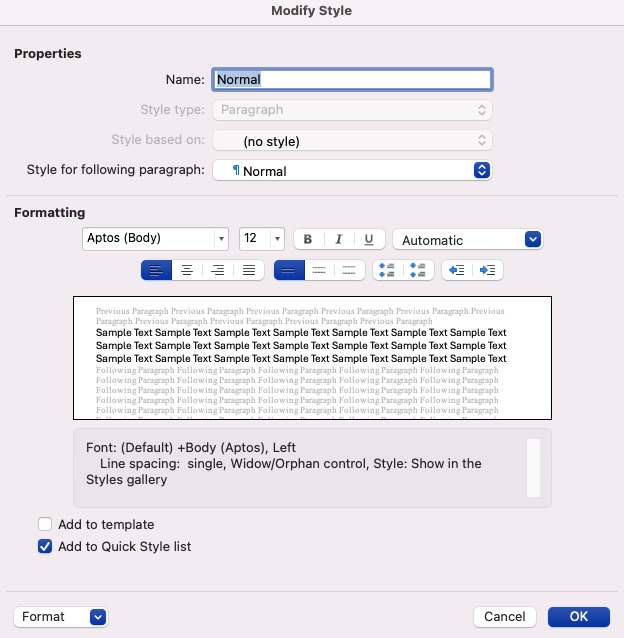
Each style can be set up with a specific combination of font, spacing, and other formatting settings. These can be changed or updated at any time and applied to your selected text with a simple click.
Styles can be found under the ‘Home’ tab. Right click on a style and then choose ‘Modify…’ to get all the formatting options:
8. Keep it Simple
One of the easiest ways to have your document look professional is to keep it simple. Keep your content concise and on-topic, then use the formatting options mentioned above to make your document visually appealing and your message easy to understand. Don’t overcomplicate things!
Formatting In Microsoft Word
If you want to make sure every document you produce looks as professional as possible, then proper formatting is the key to your success. Our Formatting In Microsoft Word course will teach you the eight steps we have covered in this post plus a whole lot more. The course is 100% self-paced, and you’ll get lifetime access to all the material.
To find out if this is the right course for you, try it for free right now!


Your email address will not be published.