

How to Add a Border to a Word Document
Whether you’re a student, a professional, or someone who loves organizing and beautifying documents, learning how to add a border to a Word document is a game-changer. This post will walk you through the benefits of adding borders and provide easy-to-follow instructions for Windows and Mac users. So, let’s enhance your Word documents together!
What Are the Benefits of Adding a Border?
Adding borders to your Word documents can significantly elevate their appearance and readability. Here’s why you should consider it:
- Visual appeal: Borders add a clean and professional look to your documents. They can make your document stand out, especially when you’re aiming to impress.
- Highlighting information: When you need to draw attention to specific sections of your document, such as titles, quotes, or summaries, borders are your best friend.
- Enhancing readability: Borders can break down the text into digestible sections, making your document easier to read and understand. This is particularly useful for long documents.
- Consistency: Using borders can help maintain consistency throughout your document or across multiple documents, reinforcing your personal or brand identity.
How to Add a Border to a Page
In a world where documents often blend into one another, a well-chosen border sets your work apart, making it memorable and engaging. But how do you go about adding this defining touch to your Word documents? Fear not, for whether you’re using Windows or Mac, the process is straightforward. Follow the steps below to add that perfect border to your page, enhancing its aesthetic and highlighting your document’s importance.
For Windows Users
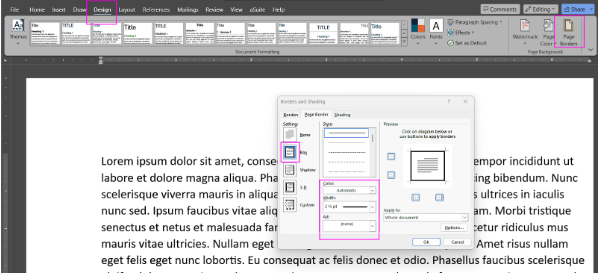
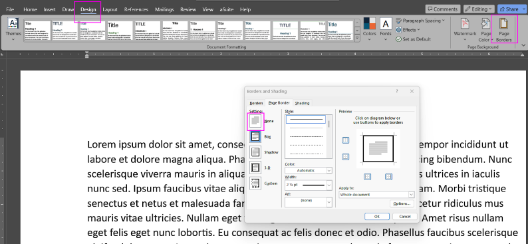
- Open your document in Word and click on the “Design” tab.
- Select the “Page Borders” option. A new window titled “Borders and Shading” will open.
- In the “Borders” tab, you can choose the “Box” setting for a simple border around the page. Here, you can select your border’s color, width, and even a fancy art style.
- Once you’re satisfied with your selection, click “OK” to apply the border to your entire document.
For Mac Users
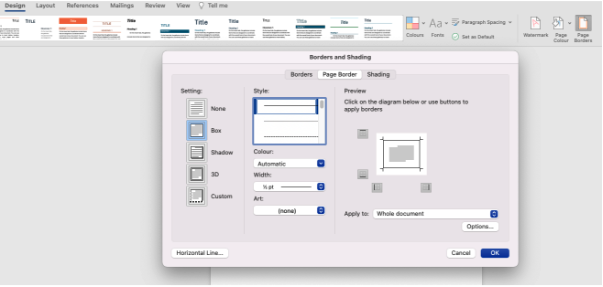
- Open your document and go to the “Design” tab.
- Click the “Page Borders” button to open the “Borders and Shading” window.
- Choose “Page Border” and “Apply to: Whole document.”
- Select your desired border settings and click “OK” to apply.
How to Add a Border to a Paragraph
While adding a border to an entire page frames the document as a whole, enclosing a specific paragraph with a border has its unique charm and utility. This technique is perfect for drawing attention to key information, such as quotes, special notes, or critical data within your document. A paragraph border acts like a spotlight, guiding your reader’s focus to where it matters most. It’s a simple yet powerful way to enhance the structure of your document and ensure that important details don’t go unnoticed.
The process is not very different from that of adding a page border. Here’s how you can add that extra layer of emphasis and design, whether you’re on a Windows PC or a Mac.
For Windows Users
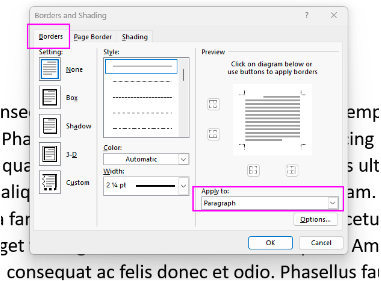
- Highlight the paragraph you want to add a border to.
- Go to the “Design” tab and click on “Borders.”
- Select “Borders and Shading” and choose your preferred border style under the “Borders” tab.
- Click “OK” to apply your settings to see the border appear around your selected text.
For Mac Users
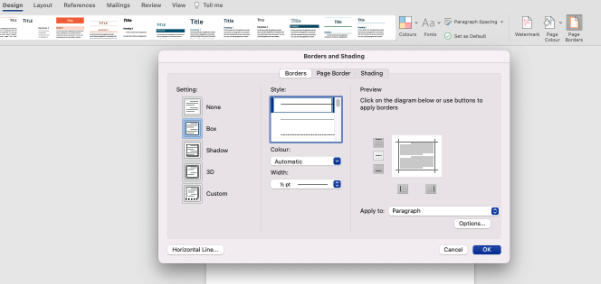
- Select the paragraph for the border.
- Navigate to the “Design” tab and click on “Borders.”
- Choose “Borders” and “Apply to: Paragraph.”
- Adjust the border settings as desired, and then click “OK” to apply the border.
How to Remove a Border
Perhaps you’ve added a border to a page or paragraph, but upon review, you decide that the design feels too crowded or simply doesn’t align with your vision. The process of removing borders is just as important as adding them, offering you flexibility and control over the final presentation of your work.
Let’s walk through the simple steps to remove borders from your document on both Windows and Mac platforms. This guide will ensure that you can easily revert your document to a borderless state, providing a cleaner, more focused canvas for your ideas.
For Windows Users
- Go to the “Design” tab and click on “Page Borders.”
- In the “Borders and Shading” window, select the “None” option under the “Settings” section.
- Click “OK” to remove the border from your page or paragraph.
For Mac Users
- Access the “Design” tab and select “Page Borders.”
- In the “Borders and Shading” window, choose “None” for the border setting.
- Apply the changes by clicking “OK.”

Formatting In Microsoft Word
Congratulations! You’ve just learned how to add and remove borders in your Word documents, elevating their design and readability. But why stop here? If you’re keen on discovering more ways to enhance your Word documents or if you want to master document formatting, check out our comprehensive Formatting In Microsoft Word course. Our course covers everything you need to create visually appealing and professional documents, from basic text formatting to advanced layout designs.
Borders are just the beginning of what you can achieve with Microsoft Word. Incorporating these techniques will improve your documents’ aesthetic appeal, functionality, and impact. Happy formatting!


Your email address will not be published.