
How to Change the Theme on Microsoft Word
Have you ever wondered how to change the theme in Microsoft Word? If you responded “yes,” you’re not alone. Lots of people know that this feature exists but don’t know how to use it.
Changing the theme in Microsoft Word is a relatively easy way to elevate your document’s visual appeal and make it look more professional. If you work with Word documents on a regular basis or offer formatting as part of your proofreading and editing services, it’s a good idea to learn how to do it.
So, how is it done? In this post, we’ll explore the process from start to finish. You’ll learn how to:
- Apply a theme
- Change the theme color
- Change the theme font
- Change the theme effects
- Save a customized theme
- Remove a theme
We’ve included screenshots to help you visualize each step.
What Is a Theme in Microsoft Word?
Before exploring the intricacies of theme customization, we need to clarify what the word theme means in the context of Microsoft Word.
A Microsoft Word theme comprises a set of coordinated fonts, colors, and effects that determine your document’s overall look and feel. By customizing the theme, you can give your documents a personalized touch. You can also use custom themes to ensure your documents adhere to any specific style guidelines that your business (or your client) follows.
How to Apply a Theme in Microsoft Word
Applying a theme in Microsoft Word is a straightforward process. Please note that the steps may vary depending on your version of Word and whether you’re using Windows or Mac. Here’s how to apply a theme:
1. Open your document in Word.
2. Navigate to the Design tab on the ribbon.

3. Click on the Themes drop-down menu to browse through the themes displayed in Word’s theme gallery.
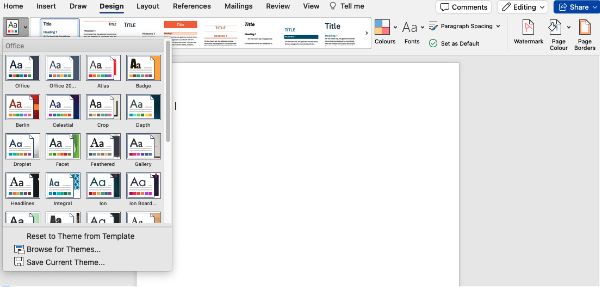
4. Click on the desired theme to apply it instantly to your document.
Changing the Theme Color
You can change Word’s theme color to one that catches your eye or suits your style or branding guidelines. Here’s how:
1. Select the Design tab.
2. Click on the Colors drop-down menu within the Themes group.

3. Choose from the predefined color sets.
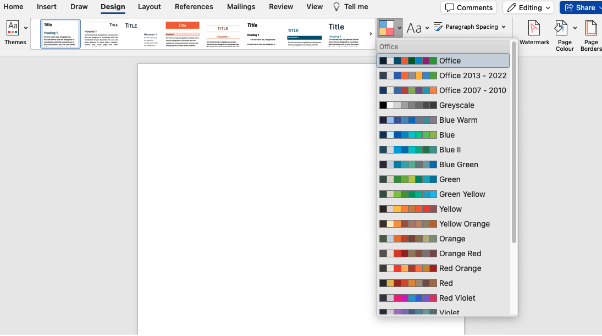
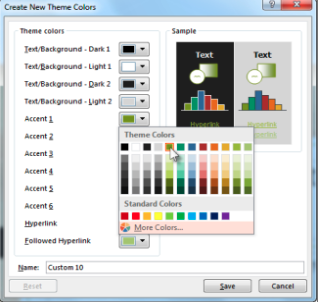
4. Alternatively, select Customize Colors (at the bottom of the list of color choices) to create a custom palette.
Changing the Theme Font
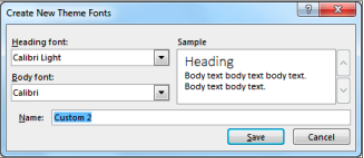
You can also adjust the theme’s font to match style and branding guidelines. We recommend choosing a font that will suit the purpose of your document and enhance readability. Here’s how to adjust the font:
1. Access the Design tab.
2. Click on the Fonts drop-down menu.

3. Pick a font combination from the available options.
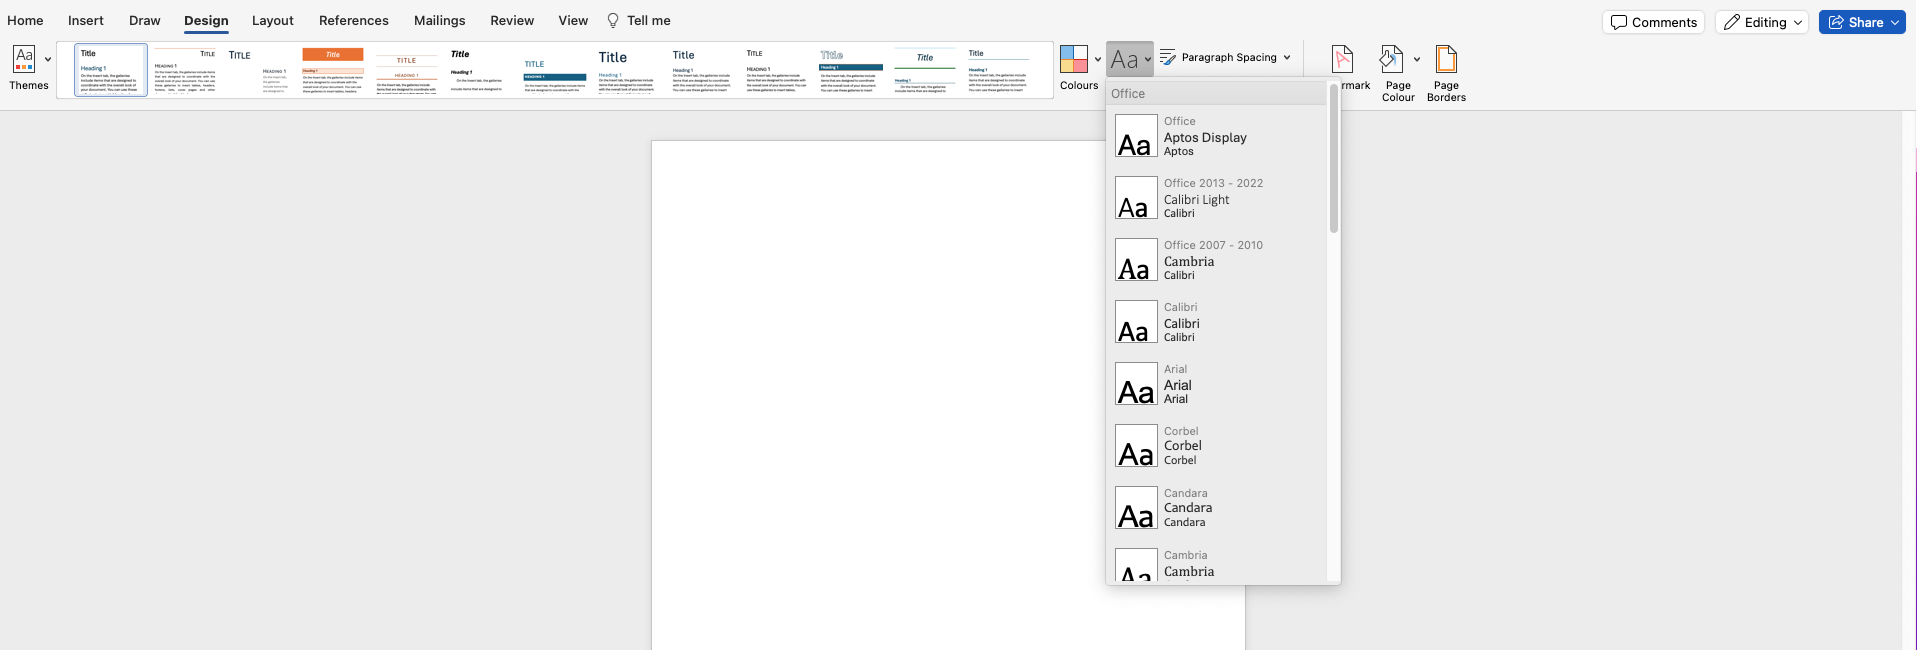
4. Alternatively, you can select Customize Fonts (at the bottom of the list of font choices) to define a preferred font pairing.
Changing the Theme Effects
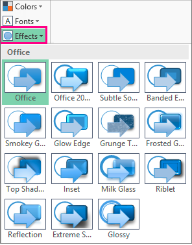
Changing Word’s theme effects allows you to change the general look of objects in a document, using shadows, reflections, lines, and fills. To change theme effects:
1. Head to the Design tab and click on the Effects drop-down menu.
2. Choose a set of effects from the list to apply to your document.
Saving Your Customized Theme
Now that you’ve fine-tuned your theme to perfection, saving it for future use is crucial. To do so, follow these steps:
1. Navigate to the Design tab and click on the Themes drop-down menu.
2. Select Save Current Theme at the bottom of the list and specify a name for your custom theme.

3. Hit Save to store your personalized theme in Word’s theme gallery.
4. To set your customized theme as the default, simply click the Set as Default button on the Design tab on the ribbon.

How to Remove a Theme in Microsoft Word
Reverting to Word’s default theme or removing any customizations is easy. Here’s how:
1. Access the Design tab.
2. Choose Reset to Theme from Template in the Themes drop-down menu to revert to the default theme.
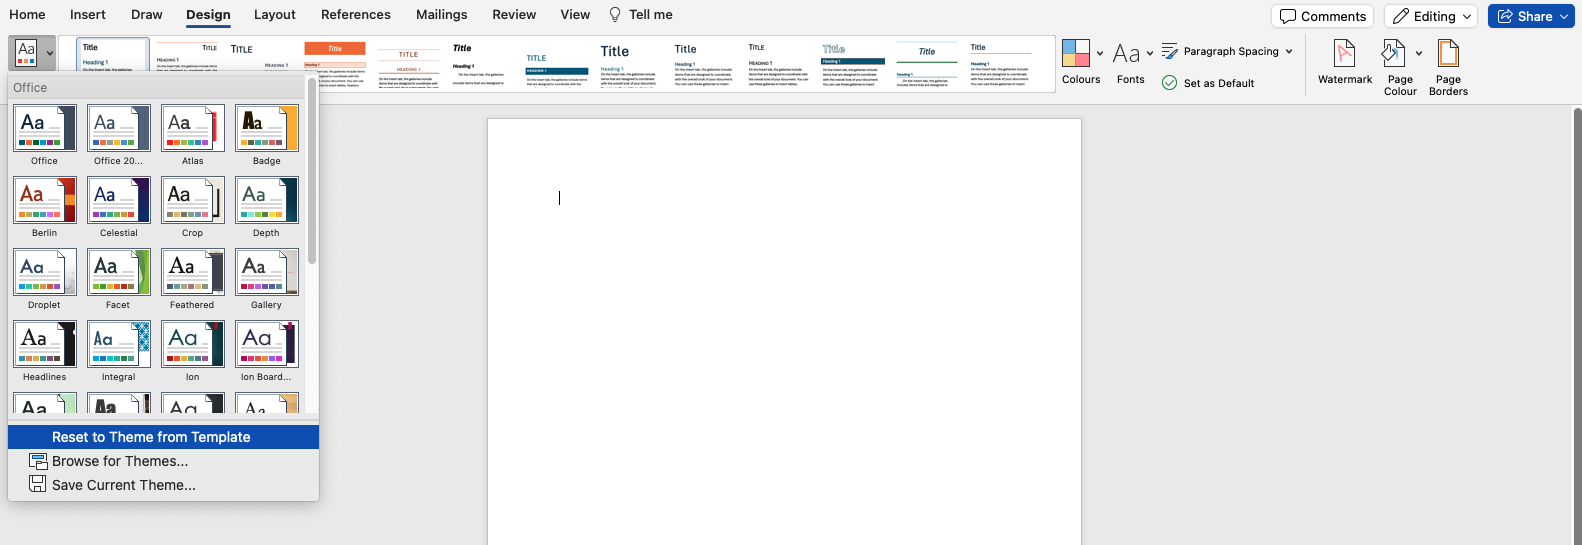
The default theme should now be restored. You may want to save the default theme, just in case.
Formatting in Microsoft Word
Are you interested in learning more about formatting? Our Formatting In Microsoft Word course will give you the formatting skills you need, whether you’re using Windows or Mac. Try it for free today.


Your email address will not be published.