

Proofreading Tips: How to Fix Ghost Formatting in MS Word
When working as a proofreader, you might find that some clients ask you to correct the formatting of a document. But have you ever come across a layout issue in Microsoft Word that seems impossible to fix? If so, you may have experienced the spectre of ghost formatting. This post will explain what this means and how to fix it.
What Is Ghost Formatting?
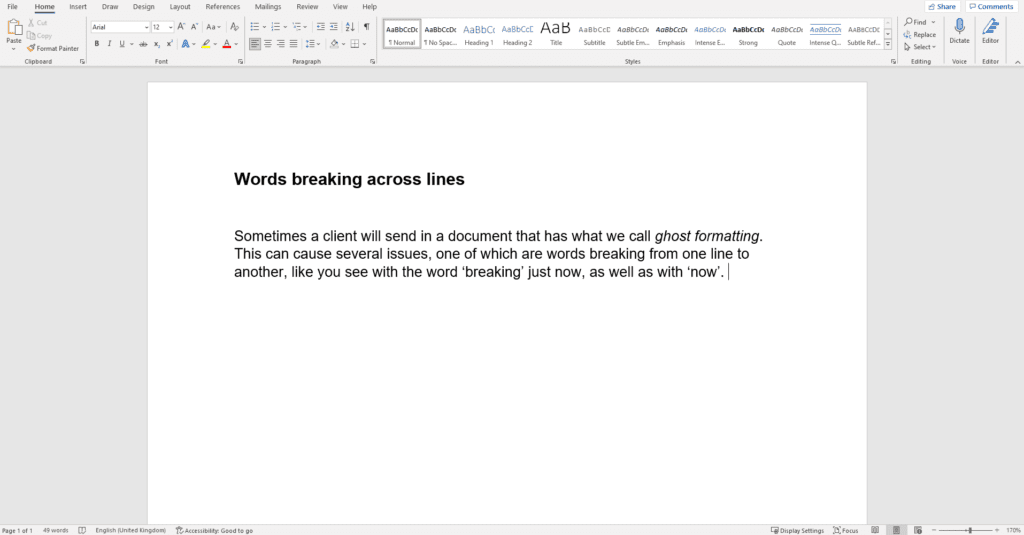
When a document contains ghost formatting, the font and paragraph settings in the Home tab appear normal, but something is amiss. Even when you change these settings, nothing seems to work.

Notice how the words “ghost,” “breaking,” and “now” split across lines, even though the font and paragraph properties seem fine and the language is set to a standard English dialect.
You might try changing the font or line spacing, but nothing will happen. Even if you do manage to make the text appear differently, it will likely be back to how it was when you close and reopen the document.
Luckily, there is a solution.
How to Fix Ghost Formatting
To remove ghost formatting:
1. Select all text, either by pressing Ctrl + A in Windows or Cmd + A in MacOS. Then copy the text either by using Ctrl/Cmd + C or by right-clicking and selecting Copy.
2. Go to File and select New. Create a Blank document.
3. In the new document, go to the Home tab and select the down arrow beneath Paste. Alternatively, you can right-click in the empty document to bring up the context menu.
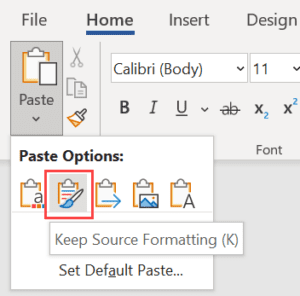
4. Select the paste option with the paintbrush, Keep Source Formatting.
5. The text should now be pasted into the new document with a normal appearance. This will (hopefully) be what the client was envisioning when they saved the document.
6. Now you need to save this document as your original document. To do this, close the original that you just copied from (the one the client sent you). Then go to File > Save As in the new document. Save this over the original document.
7. Finally, go to File > Save As again to save the copy of the file that you’ll edit.
Making this new original document will prevent the ghost formatting from sneaking into the eventual copy of the document that has your edits marked up.
You can test whether the process was successful by closing the document, then opening it again. If the text still appears normal, congratulations – you’ve exorcized the ghost formatting!
Becoming A Proofreader
Are you looking to start a career as a freelance proofreader? Our Becoming A Proofreader course contains everything you need to know to proofread professionally and even has a module on advanced formatting. Sign up for a free trial and begin your journey today!


Your email address will not be published.