

Understanding the Proofing Options in Microsoft Word
The spellchecker in Microsoft Word cannot replace expert proofreading, but it can be a useful tool for proofreaders. We look at this in our Becoming A Proofreader course. However, to make the most of this tool, you need to understand the proofing options in Microsoft Word.
How to Access the Proofing Options in Microsoft Word
Even if you have used the spellchecker in Microsoft Word, you may not have realized how much you can customize what it looks for and how it highlights errors.
To access these proofing options, you need to:
- Open a Microsoft Word document.
- Go to File > Options.
- Select Proofing from the list on the left of the dialog box.
In Word for Mac, meanwhile you can access similar options by:
- Going to Word > Preferences.
- Clicking Authoring and Proofing Tools and selecting Spelling and Grammar.
Here, you will see options for customizing the spellchecker, including some that apply to all Microsoft Office programs and some for Word in particular. Let’s take a quick look at both.
Proofing Settings for Microsoft Office
You can control the proofing options across all Microsoft Office programs in the section titled “When correcting spelling in Microsoft Office programs.” These include:
- The ability to ignore certain terms, including UPPERCASE TERMS and URLs.
- Flagging instances where the same word is used twice in a row.
- Options to select and customize the dictionary used for spellchecking.

Depending on the languages you have installed in your version of Microsoft Office, you may also see other language-specific options here. We’ll focus on English for now, though!
Proofing Settings for Word
The most important options for using the spellchecker effectively in Word are in the “When correcting spelling and grammar in Word” section. These include:
- Check spelling as you type – Controls whether Word will highlight errors as you type (if you deselect this, you will need to run the spellchecker manually).
- Mark grammar errors as you type – As above, but for grammar errors.
- Frequently confused words – Highlights words that it thinks may have been confused for another term (e.g., mix ups of “effect” and “affect”).
- Check grammar with spelling – When checked, Word will check both grammar and spelling when you run a spellcheck (when unchecked, it will only check spelling).
- Show readability statistics – Provides readability stats at the end of a spellcheck.

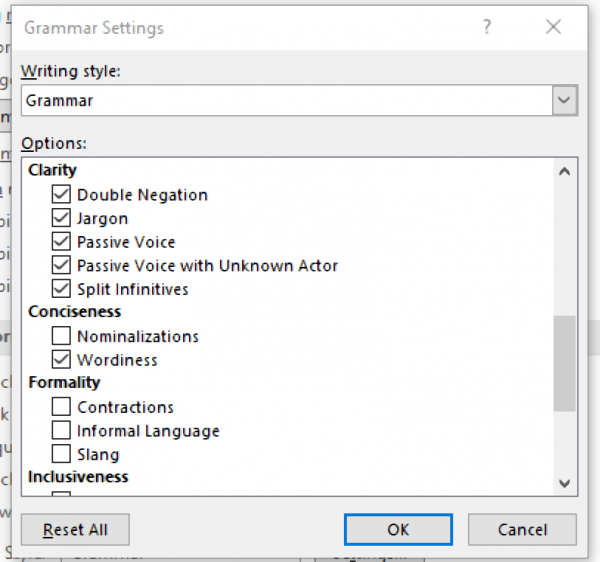
Beneath these options, you’ll also see a “Writing Style” menu. The options here are:
- Grammar – Focuses on errors related to grammar and punctuation, such as comma splices, incorrect verb forms, or mixing up adverbs and adjectives.
- Grammar & Refinements – Also looks for potential stylistic issues, such as gendered language, excessive wordiness, or informal language.
Both options can be fully customized by clicking the “Settings” button next to the menu. This will open a new dialogue box where you can select or deselect specific issues to check.
Becoming A Proofreader
Do you want to start a career as a freelance proofreader? Our Becoming A Proofreader course contains everything you need to know to proofread professionally! Sign up for a free trial today.


Your email address will not be published.